

Running a live session
A session links a protocol, a class, and a room — this is what you actually run in class.
Start a session
From the Sessions tab, there are two ways to get going:
- Create a new session: select a protocol, a class and a room, then tap Start
- Resume an ongoing session: sessions not yet closed appear in the list below — useful if your session spans several days
Build the groups
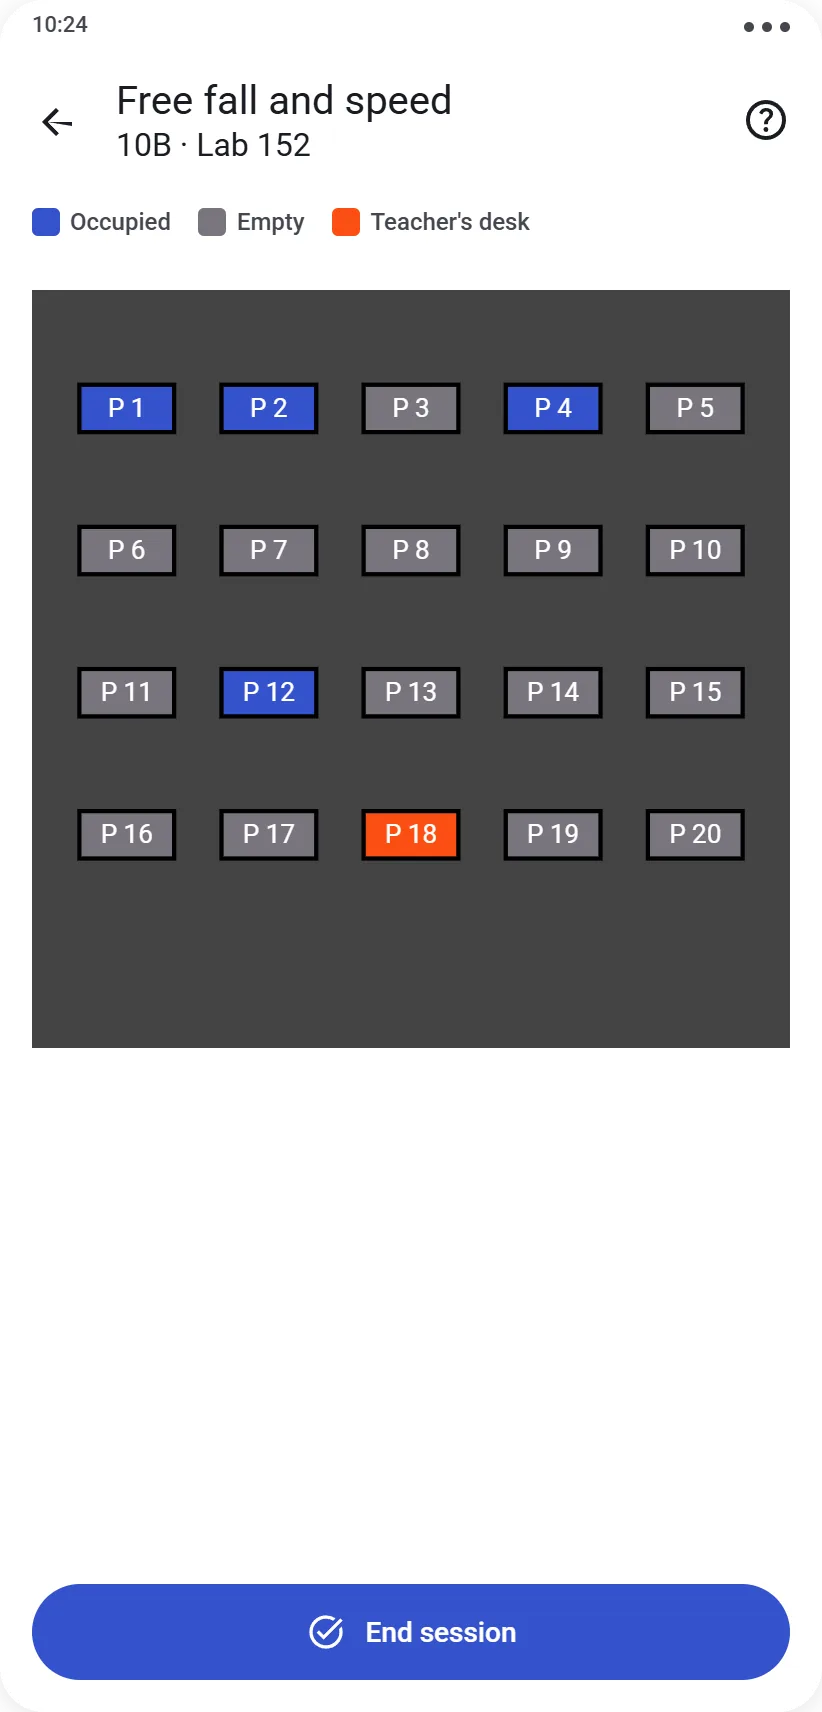
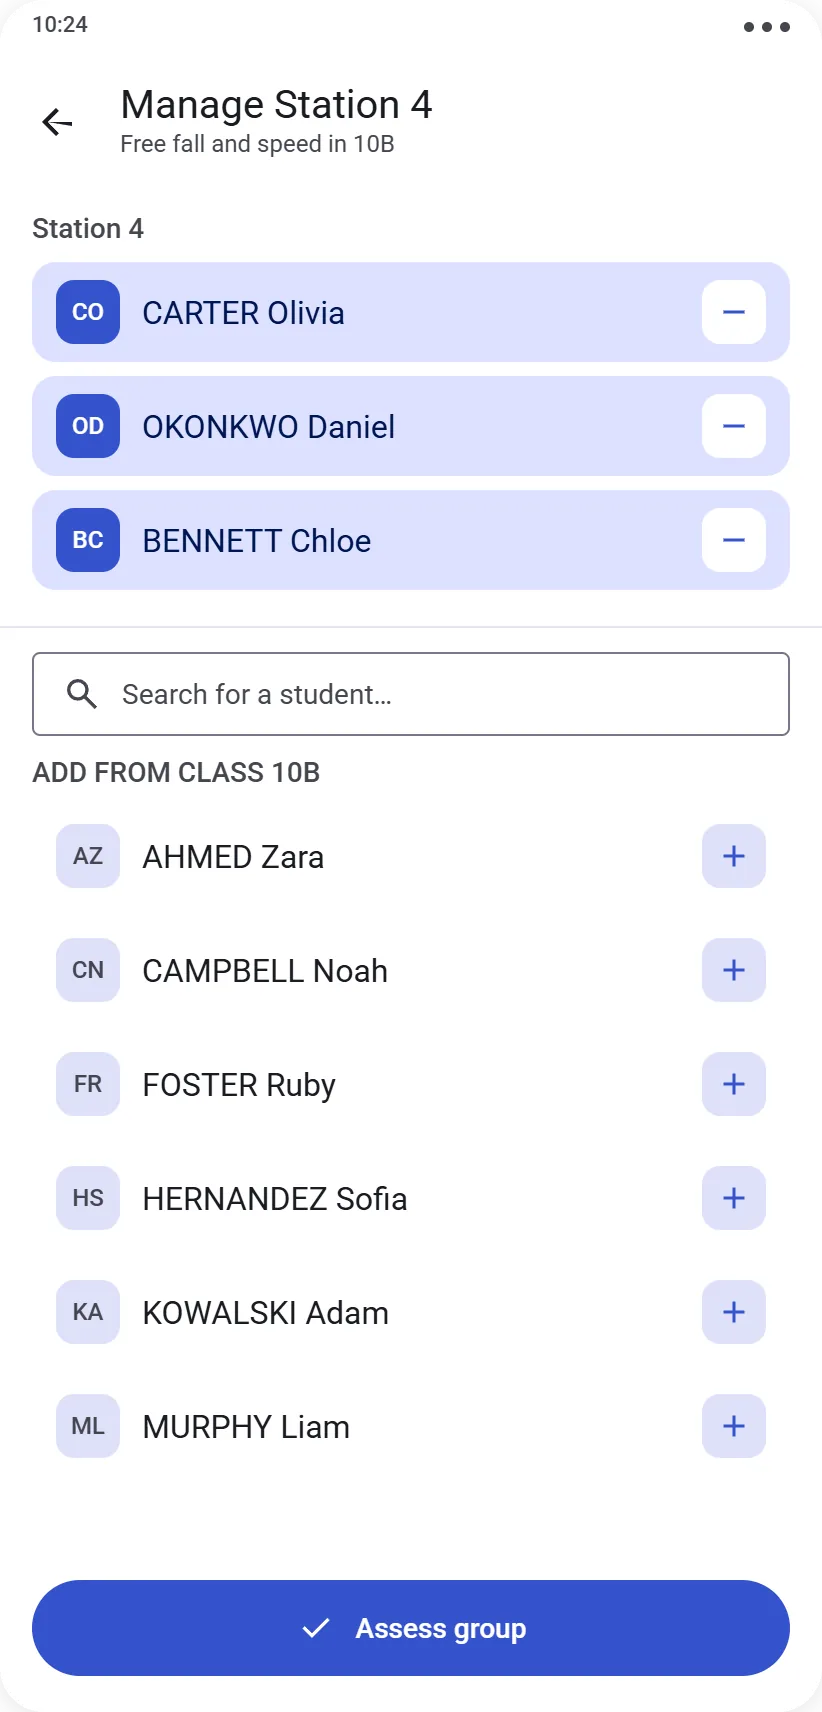
From the session screen, your room’s layout is displayed with each workstation ready to be filled. For each workstation, add students from the list of those not yet placed (search available to go faster).
If this same class has already worked in this same room during a previous session, the app offers to automatically reuse the group layout.
Grade a workstation
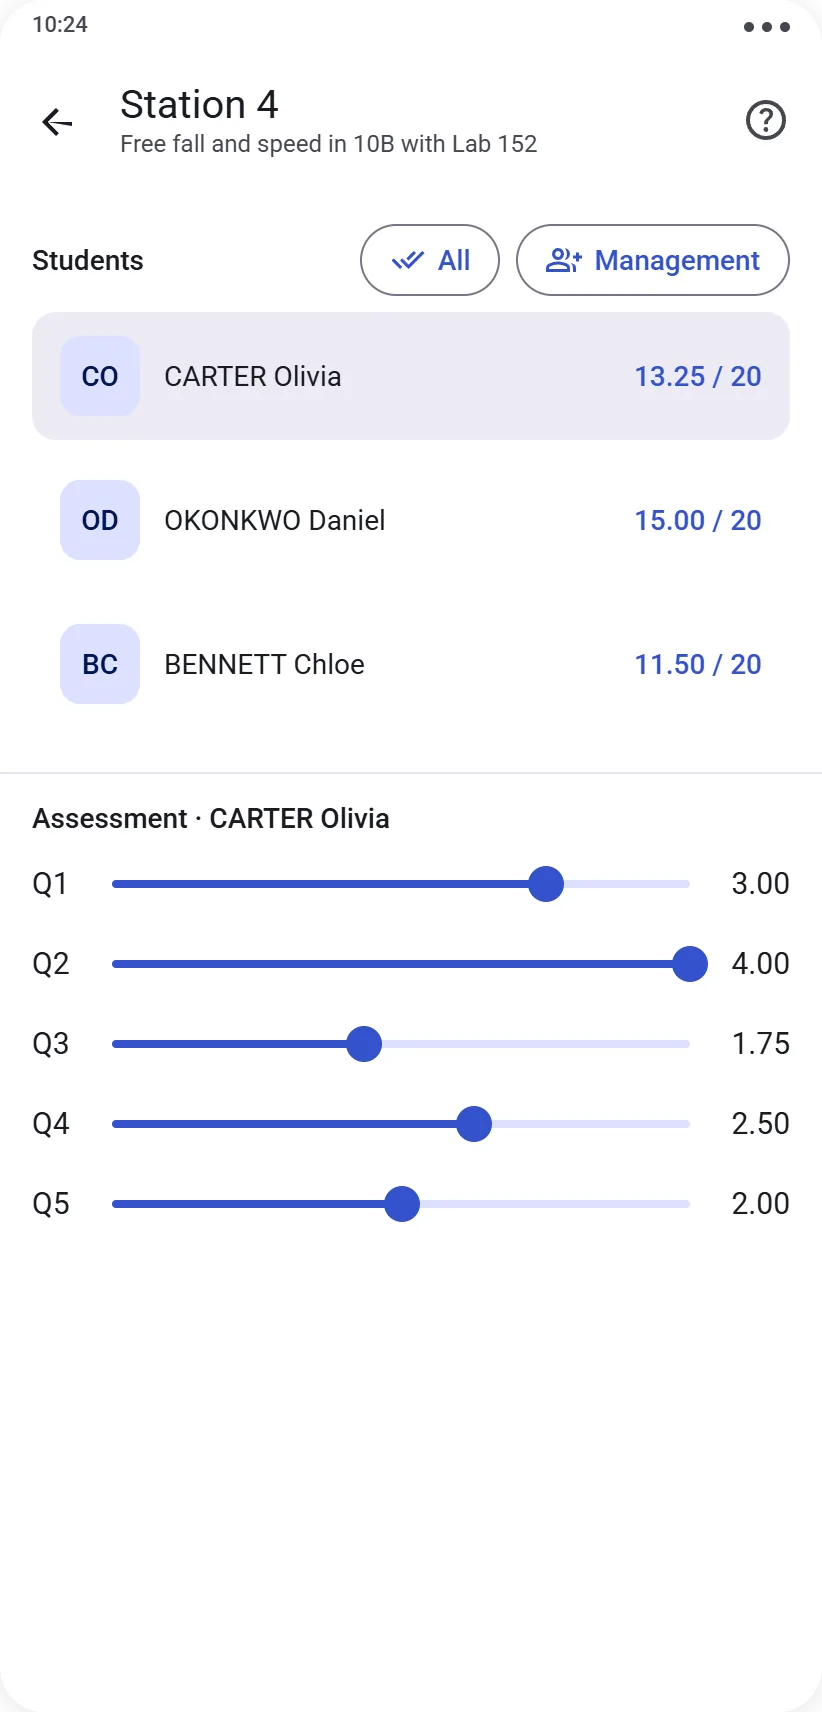
Opening a workstation, the Students area is used to select who you’re grading right now, not to manage group membership:
- tap a student to select them alone
- tap All to select the whole group at once
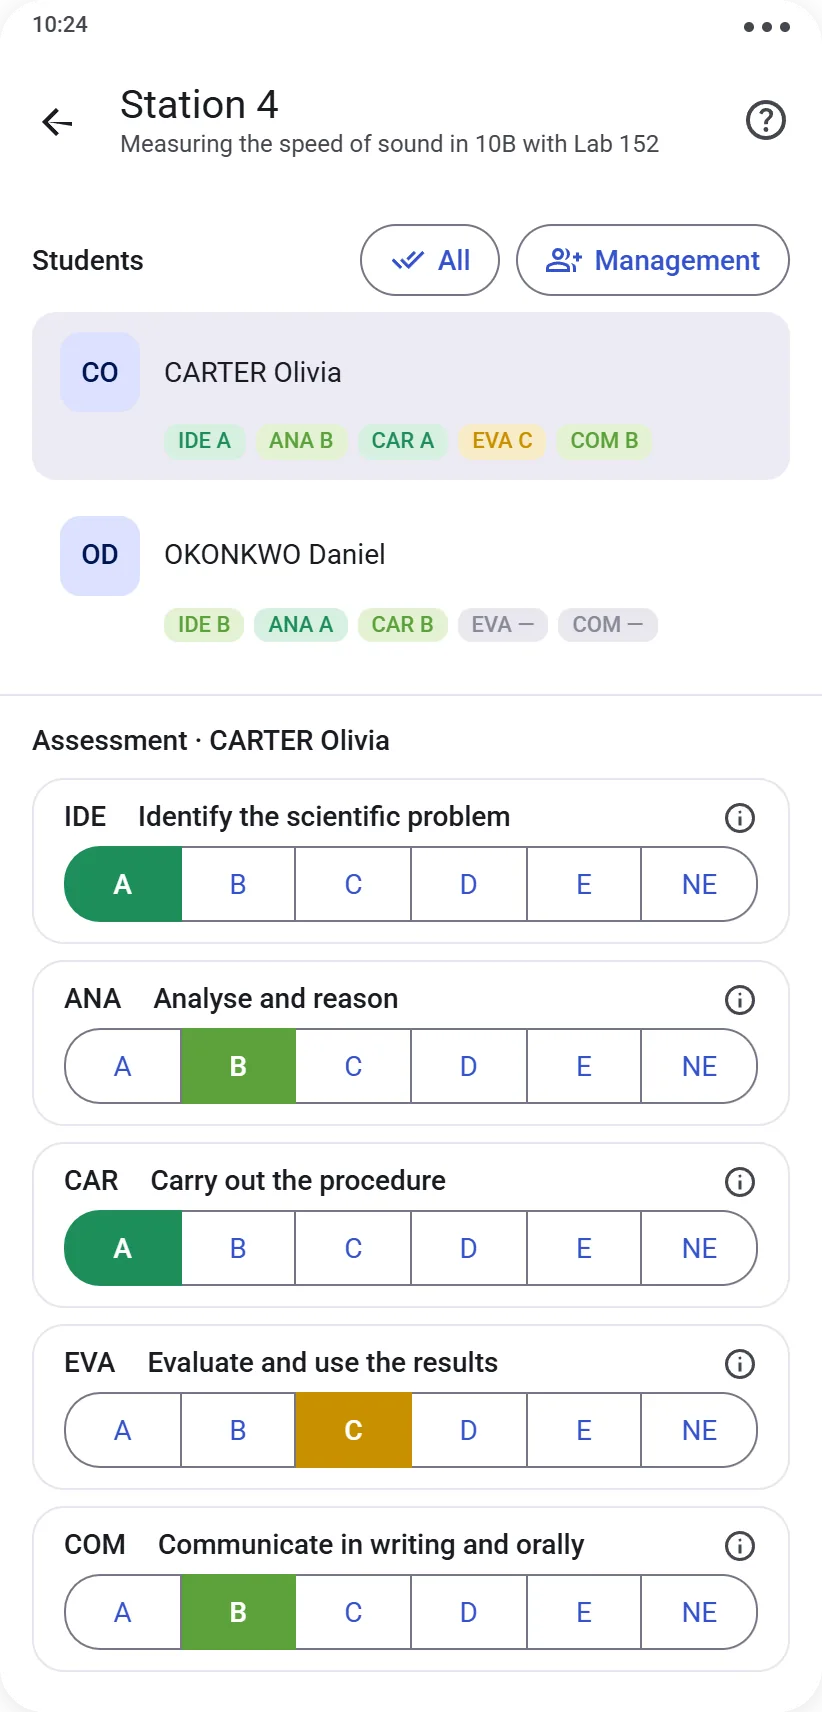
The grade you then enter applies to everyone currently selected, and saves automatically, with no button to confirm. If some items have already been graded differently across students in the group, they stay protected in “All” mode — no risk of accidentally overwriting an individual grade already entered.
What the grading area shows depends on the protocol type chosen for this session:
Question type — a slider per question, adjusted to the points earned
Competency type — an A / B / C / D / E / NE selector per assessed competency
Ending the session
Closing the session (button at the bottom of the screen) makes the results visible in the Results tab — see the Checking the results guide.
Closing isn’t required: if your session continues another day, leave it open and pick up grading later exactly where you left off.