

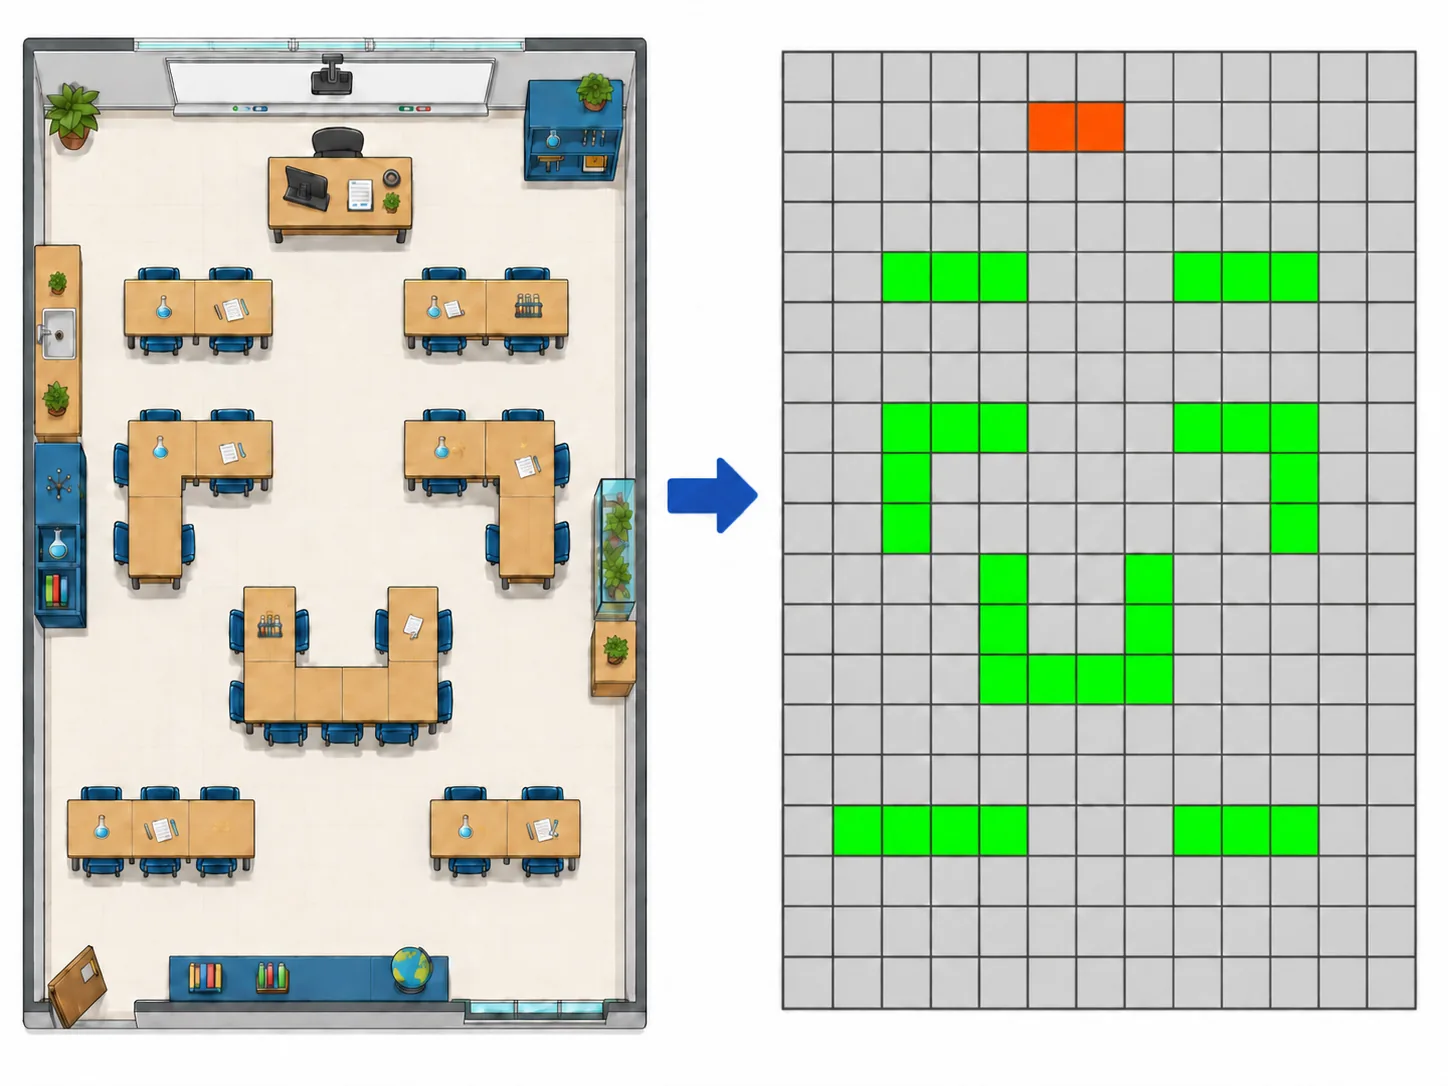
Create a room
From Management → Rooms, tap + Room. Only one field is required: the name (e.g. “Chemistry lab”, “Room 152”).
(the free version allows 1 room)
Draw the layout
Once the room is created, you’re taken directly to its layout screen — an empty grid to fill in.
Each workstation can only take one of three shapes: rectangle, L, or U (viewable anytime via the ? help menu at the top of the screen).
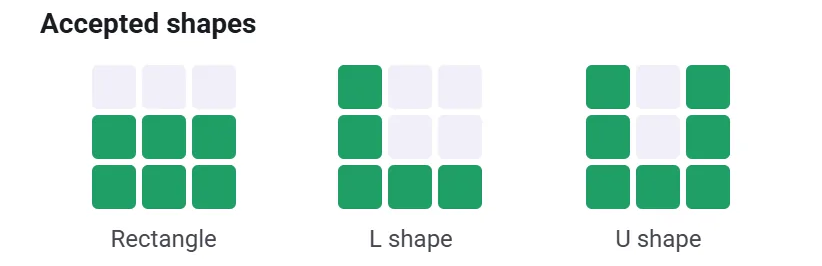
To draw:
- On an empty cell: press and drag your finger across the screen to “light up” the cells you pass over, forming a workstation. If the resulting shape matches one of the three accepted shapes, the cells turn green; otherwise, they turn orange until a valid shape is formed.
- On an already-colored cell: you switch to erase mode — drag your finger to free the cells you pass over. If erasing leaves a remaining workstation that no longer matches a recognized shape, the affected cells turn orange.
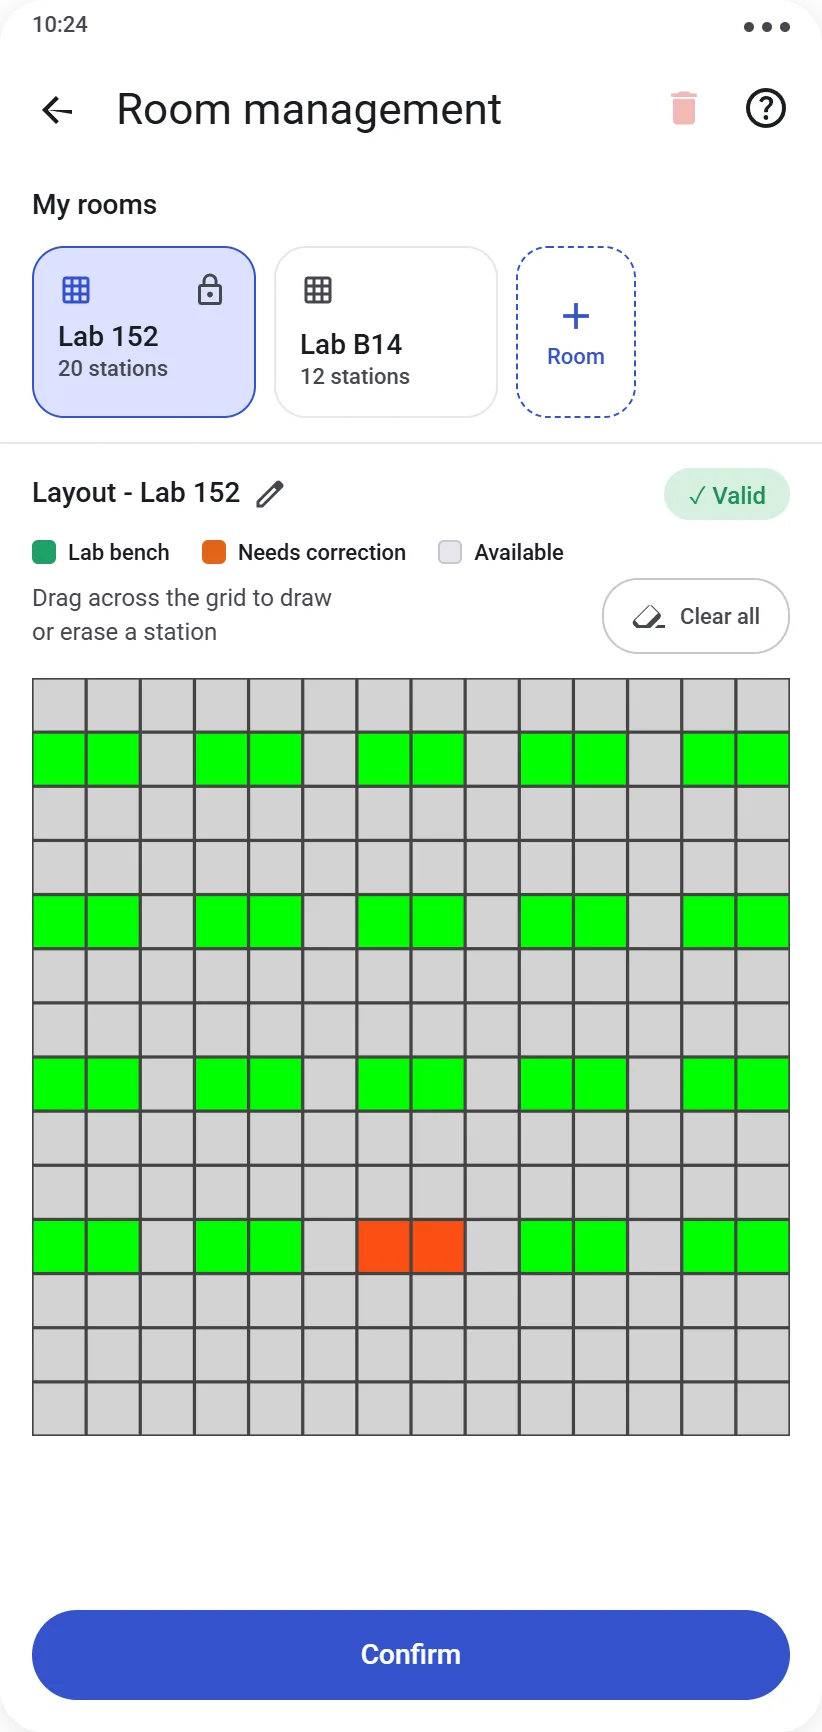
A long press on a workstation turns it into the teacher’s desk (changes color).
A badge at the top of the screen shows the state of your layout:
- ✓ Valid (green) — the layout is complete and ready to use
- ✕ Needs fixing (orange) — at least one shape isn’t recognized, an adjustment is needed before this room can be used in a session
Layout changes are only saved once you tap Confirm layout, at the bottom of the screen.
To start over, the Clear all button fully resets the grid for the room currently shown.
Managing multiple rooms
(EasyPrac Full feature — the free version is limited to 1 room)
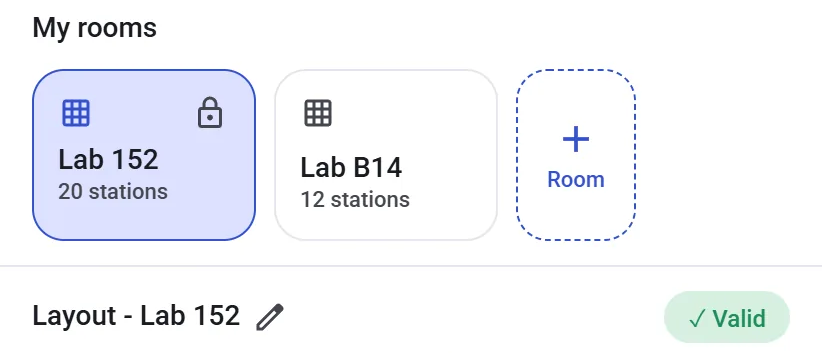
All your rooms appear as a strip at the top of the screen. Tap one to view (and edit) its layout — no need to navigate back and forth between them.
A room currently used by an ongoing session shows a lock icon: its workstations in use can no longer be edited.
To rename a room, tap the pencil icon next to its name, or long-press its chip in the strip.
During the session
On the day of the practical session, the room layout reappears on screen, with each workstation identifiable at a glance (occupied, empty, or teacher’s desk) — see the Running a live session guide.